Google “exercises for back pain” and you will find thousands of sites with exercises for the core. Top hits include: planks, bridges, pelvic tilts, crunches and face down arm and leg raises.
The problem with many of these back pain exercises is that they lack movement of the body in ways that are natural. Visualize each exercise. What do they have in common?
You got it! They either hold the body still or move the body in 2 directions (front to back) – neither of these tactics are consistent with the way the body moves day-to-day.
Joints need adequate mobility and strength. For example, every time we take a step, the body needs to load (as our knees and hips bend) and use that energy to push off and propel the body forward. Therefore, exercises that hold the body still are incomplete. Check out this moving plank exercise.
To strengthen the body, exercises should include movement. Reduce back pain by moving in 6 directions: front to back, side-to-side, and rotate right and left.
5 Exercises for Low Back Pain
Reduce low back pain. Do exercises that improve mobility and strength of the abs and back. The pool is a great place to get started. It is well documented that water aerobics is an effective way to improve strength and mobility.
Hips that are mobile and strong are key to reducing back pain.
- Single Leg Balance Reach: For Mobility
Begin standing on one leg (knee is soft). If needed, hold a pool wall for balance. Reach the suspended foot in a comfortable range:
- Front to back (repeat 5x)
- Right to left (repeat 5x)
- Right and left rotation (repeat 5x)
Perform on both sides of the body.
- Single Leg Balance Reach: For Strength
Next, try the same routine moving at a quicker speed. As you move faster, your range of motion should decrease. Perform 5-10x on both sides of the body.
Click here for a visual demonstration of the Single Leg Balance Reach.
Next up is an exercise that I weave into all of my workouts. It uses the upper body to initiate the movement, but has a domino reaching effect on the shoulders, back, hips and even the ankles. This is truly a whole body exercise that has tremendous results on improving core mobility and core strength. Perhaps this could be the perfect exercise for reducing low back pain!
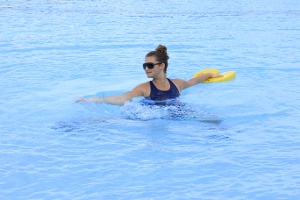
- Single Arm Reach at Water Surface: For Mobility
Begin in a lunge. The reaching arm is opposite to the leg in front. Your back heel is free to lift off the pool floor as you move through this exercise. Relax the shoulders and reach the hand:
- Behind the body and back to the front (right and left rotation just below the surface)
- Perform 5-10x on both sides of the body
- Single Arm Reach at Water Surface: For Strength
In order to target strength, we are going to use acceleration. This is a term used to describe any time you change your speed or your direction. We’re going to use both.
- Round #1 – Strengthen the Abdominals. Moving just below the surface of the water, slowly reach the arm behind the body. Allow the hips to follow the reaching arm. On the return, pull the water forward. Hips and hand should be moving together to prevent twisting of the low back. As you get stronger, challenge yourself to move more water. Repeat 10-15 times on both sides of the body.
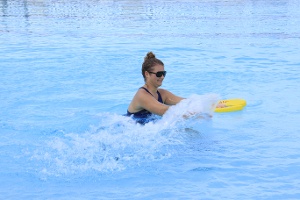
Reach back easy Pull water forward
- Round #2 – Strengthen the Back. Still moving just below the surface, repeat this same arm action but emphasize pushing the water behind the body. Hips and hand should still move together. Repeat 10-15 times on both sides of the body.


Push water back Reach forward easy
- Round #3 – Strengthen the Abdominals and Back. When you can comfortably target the abs and back independently, try both. Targeting both directions at once can be a big challenge! Be sure to maintain the great technique you practiced in the earlier rounds.
- Walk Backwards
This exercise can be used at the beginning or end of any exercise routine. With each step:
- Roll the foot toe to heel. Good technique requires small steps.
- Stand upright. Walking against the resistance of the water strengthens the back.
- Slow down! Better muscle engagement comes with a slower pace.
Know Your Limits
Here are a couple of tips to help monitor intensity:
- Slow down. Oftentimes we think we need to move faster to work harder and get better results. Going faster tends to lead to poor posture. Take advantage of the support of buoyancy helping to facilitate good upright posture.
- Make the move smaller. Bigger is not always better. In the pool it feels so good to move and therefore the tendency is to move in a big range. The problem with this is that if the move is too big, it can also mean we are “cheating” by overworking some muscles and not effectively working others. For example, in the pool try a side leg lift. How high can you reach? If your answer is: “I can reach all the way to the surface!” chances are you have rotated the leg so that your toes are facing up rather than straight ahead.
- Make the exercise 3-dimensional. We’ve discussed the importance of moving the body in 6 directions, rather than just 2. To avoid working some muscles too much and others not enough, try applying 3-dimensional approach to your favorite pool exercises.
Ready to get support?
WECOACH Workouts is here to help you! If you’re ready to start moving and feeling better, check out this Abs & Back Workout, and learn more about our simple, proven, and effective methods that’ll help you move and live better.